 ClassBright Evaluate Help
Home / Manager / Observation/Walkthrough Forms
Observation/Walkthrough Forms
ClassBright Evaluate allows you to create custom Walkthrough forms at the district-level to provide to your Observers. Only people who have access to Manage Forms can create and edit Walkthroughs.
Creating Form Items
Step 1: The form-building process begins with creating individual Form Items. The beauty of this is that you can then use a Form Item on one or more different forms, while retaining the aggregated alignments to criteria across those mulitple forms.
From your dashboard’s Observation Forms section, click into Form Items. Click the +Add Form Item button in the top-right corner.

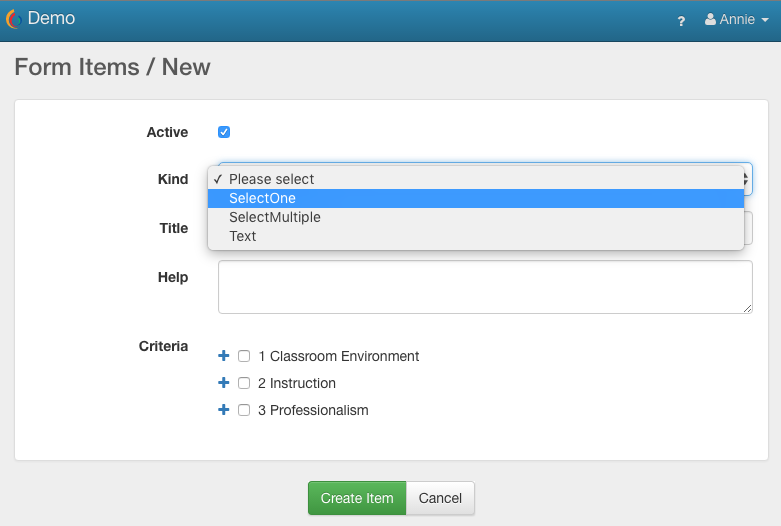
Step 2: There are three kinds of Form Items you can choose from:
- SelectOne: Observer can select one Answer Option from a list
- SelectMultiple: Oberver can mark one or more checkboxes from a list
- Text: Observer can type into a freeform text field
Choose one kind from the list.
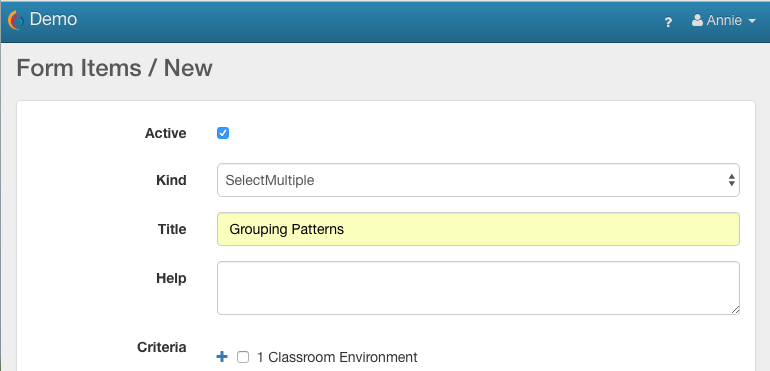
Step 2: Type in a Title for this Form Item, which is the Question or Statement for the Observer to respond to. You can also input a hint or other prompt in the Help field (optional).
Step 3: Expand the Criteria to select the specific indicators that align with this item.
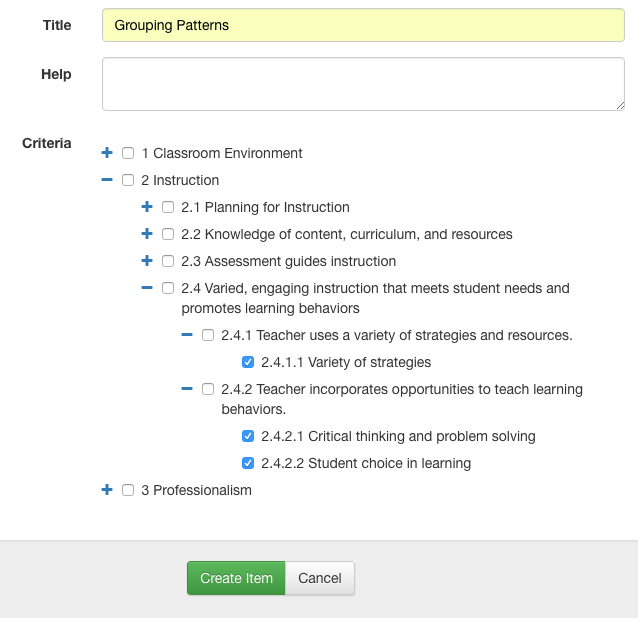
Click the Create Item button at the bottom to save your work.
Step 4: For SelectOne or SelectMulitple kinds of items, you will then need to create the associated list of answer options. Click the +Add Option button at the bottom-right.
Type in the Name of an answer option, then click the button to Create Option.
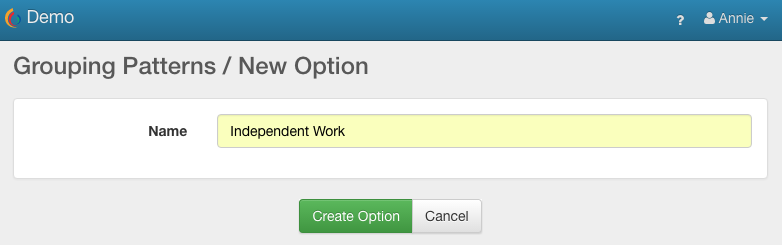
Repeat this process until you have input every answer option for this Form Item.
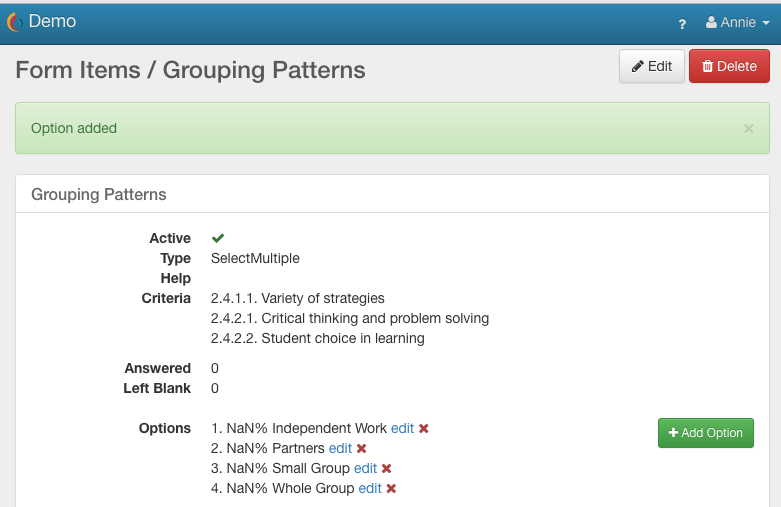
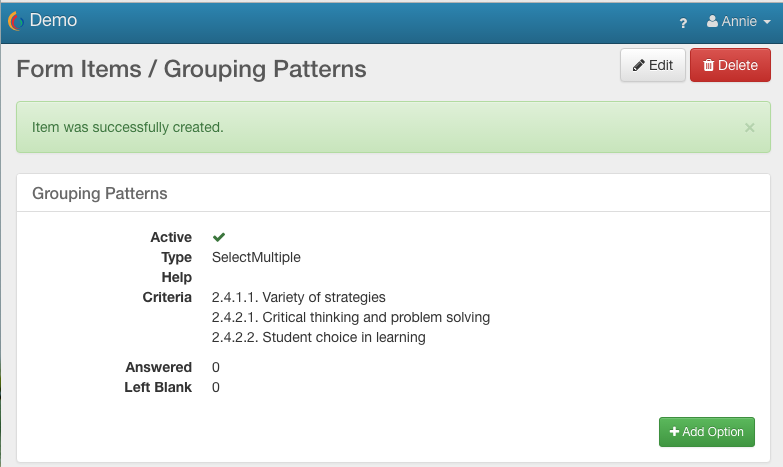
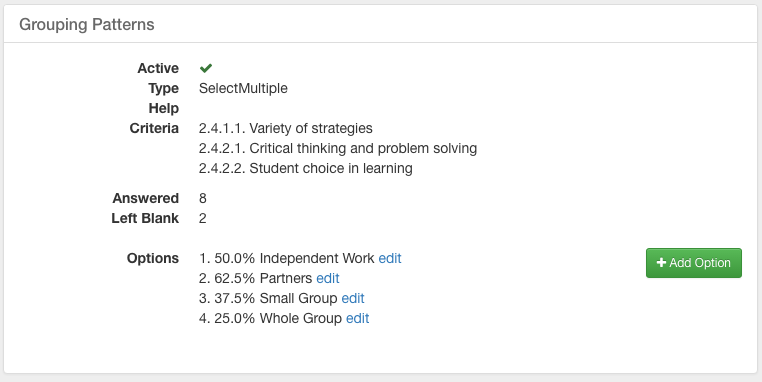
NOTE: As this Form Item is used on forms by your Observers, the percentage of answers will also be summarized by option on this page - see below for example.
Creating an Observation/Walkthrough Form
From your dashboard, click into Observation Forms.
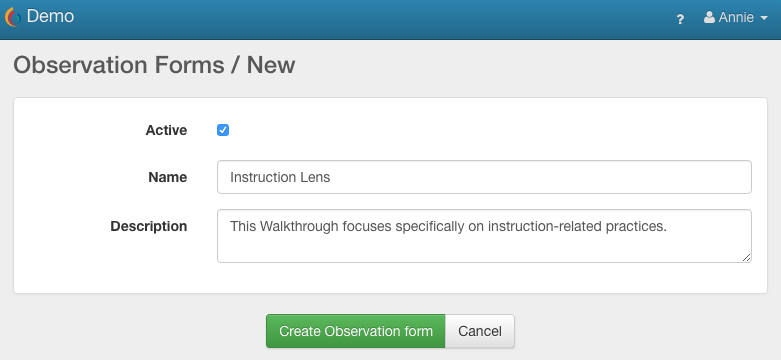
Step 1: Click the +Add Observation Form button.

Step 2: Type in a Name for the form and also a Description (optional). Click the Create Observation Form button to save and continue.
NOTE: This form is automatically Active and will immediately be available to Observers for use. If you are not ready to release it to them yet, simply unmark the Active checkbox here; you can return to this screen later to edit that when you are ready.
Step 3: On the next screen is where you will actually build the form, item by item. In the Add Item section, use the pull-down to view and select a Form Item from the list. Then click the Add Item button to save your selection and add it to the form.
As you add an item to the form, it will be removed from the pull-down list to avoid accidentally duplicating the same item on a form.

Step 4: Continue building the form by selecting the next For Item to add and repeat process until the form is complete.
NOTE: The process is quickest if you already know the order for the Form Items that you want. However, you can click and drag an item to re-order it on the form, as needed.
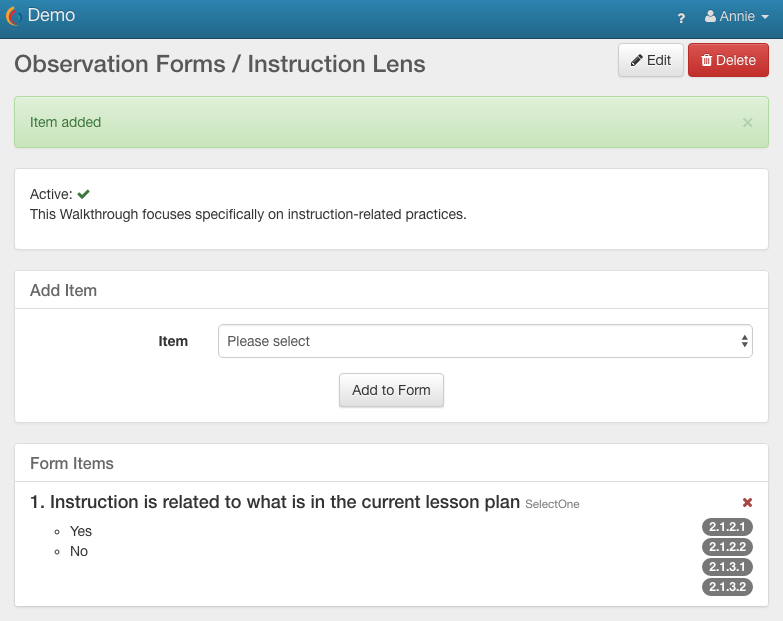
Step 5: The form auto-saves your selections, so there is no “save” button here. Simply click the Observation Forms link in the page header to review your list of forms or click the system header to return to your dashboard.
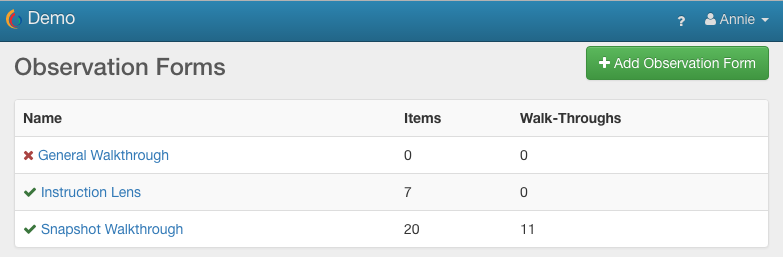
Your Observations Forms list shows which forms are Active, how many Form Items have been included on each form, and also how many times an Observer has used each form to complete a Walkthrough.
To Edit: Simply come to your list of Observation Forms, click the form’s name you want to edit, and then click the Edit button in the top-right corner of the screen.